Wednesday, February 21, 2018

Oracle Database 18c

If you are not aware, Oracle 18c was released on Friday, 16th Feb. It is the patchset version 12.2.0.2 and also the very first on the new release model introduced by Oracle(https://mikedietrichde.com/2017/11/07/ru-rur-recommendations-facts/).
The name has simply been changed to reflect the year in which it has been released.

Note:Oracle 18c is not an Autonomous database. If we buy an Autonomous Database cloud service on oracle Public Cloud, that qualifies as the autonomous database. You can refer to oracle base blog:https://oracle-base.com/blog/2018/01/05/oracle-database-18c-is-not-an-autonomous-database-update/

How the new version number works is explained in MOS Doc ID 2285040.1 and the release schedule for these database versions are explained in the MOS Doc ID 742060.1.

Some of the new features are:

1. Read Only Oracle Home (ROOH)

2. Columnar Format Exadata Flash Cache Enhancements
With Oracle Database 18c we now support accessing non-HCC objects in the Exadata Flash cache in full Database In-Memory columnar format. In 12.2 this was restricted to just HCC objects.

3. Scalable Sequences
A scalable sequence is particularly efficient when used to generate unordered primary or unique keys for data ingestion workloads having high level of concurrency. Scalable sequences significantly reduce the sequence and index block contention.

4. Converting Normal or High Redundancy Disk Groups to Flex Disk Groups without Restricted Mount
You can convert a conventional disk group (disk group created before Oracle Database18c) to an Oracle ASM flex disk group without using the restrictive mount (MOUNTED RESTRICTED) option.

5. ALTER SYSTEM CANCEL SQL
Another way to kill/cancel a SQL in a session.
The syntax would be like …

ALTER SYSTEM CANCEL SQL ‘SID, SERIAL[, @INST_ID][, SQL_ID]’;
e.g. ALTER SYSTEM CANCEL SQL ‘448, 98175, @1, 761hchah78addfj’;

6. The default value of PARALLEL_THREADS_PER_CPU is finally set 1 as default!
PARALLEL_THREADS_PER_CPU describes the number of parallel execution processes or threads that a CPU can handle during parallel execution. Good Move! 🙂

7. For users of Exadata and Real Application Clusters (RAC), Oracle Database 18c brings changes that will enable a significant reduction in the amount of undo that needs to be transferred across the interconnect. It achieves this by using RDMA, over the Infiniband connection, to access the undo blocks in the remote instance. This feature combined with a local commit cache significantly improves the throughput of some OLTP workloads when running on top of RAC.

8. 18c Authenticate and authorize Oracle users directly with Microsoft Active Directory

9. New Oracle Spatial features in Oracle Database 18c include distributed transactions, sharding, easier to use web services admin console.


Where to get started:
https://docs.oracle.com/en/database/oracle/oracle-database/18/index.html

Oracle 18c new feature:-https://docs.oracle.com/en/database/oracle/oracle-database/18/newft/new-features.html#GUID-04A4834D-848F-44D5-8C34-36237D40F194

https://blogs.oracle.com/database/oracle-database-18c-%3a-now-available-on-the-oracle-cloud-and-oracle-engineered-systems

Please keep in mind that this is not yet released for On premises. As of now, Oracle 18c is only available for Oracle public Cloud and Oracle Engineered Systems.

Keep Learning


Monday, February 19, 2018

EBS on Oracle Cloud

With the advent of Cloud, nowadays there are multiple options to deploy the applications and database. Cloud gives us the flexibility to run the enterprise with multiple options available and thus it is very much important to tone the right choice. With the help of Oracle cloud, one can easily create an instance without any need to wait for hardware and other resources. We can easily scale up or scale out the infrastructure on demand. Oracle cloud gives us the flexibility to pay as we go and also provides “bring your own license”.


This post  is all about the various options available for EBS on Oracle cloud and also describe the high level steps for deploying EBS on Oracle Cloud.

There are two ways to use EBS on Oracle Cloud

1.Provision new EBS on cloud

2. lift and shift EBS from on premises to Oracle Cloud

The Lift and Shift process is supported for:

Oracle E-Business Suite Release 12.1.3
Oracle E-Business Suite Release 12.2.3 and higher

>>>Getting Started with Oracle E-Business Suite on Oracle Cloud (Doc ID 2066260.1)

Currently, Oracle certifies only EBS 12.2 and EBS 12.1.3 to run on Cloud. We will be doing a fresh installation of EBS 12.2.7 in linux X86-64 images. And the database will be 12.1.0.2.


There are three Oracle Cloud category.

1.Oracle Cloud Infrastructure
2. Oracle Cloud infrastructure classic
3. oracle Cloud infrastructure compue classic-Dedicated Compute capacity-Sparc Model 300

1.Oracle Cloud Infrastructure- Oracle till now has certified running ebs on Oracle cloud on Linux x86-64. For EBS 12.2 and EBS 12.1.3, Oracle database 12.1.0.2 and 11.2.0.4 is now certified.

What is Compute-It is the virtual infrastructure provided by Oracle.
Before moving forward, we should first "Sign up for Oracle Cloud infrastructure". We need to choose the oracle Cloud infrastructure -Compute VM".

To run Oracle E-Business Suite on Oracle Cloud Infrastructure Classic, you need to purchase at least a subscription to compute services (referred to as "Compute Classic"). Optionally, you can also subscribe to Oracle Database Cloud Service (DBCS) or Oracle Exadata Cloud Service (Exadata CS) to run your Oracle E-Business Suite databases (including Oracle RAC databases).


Certified combinations and automated lift and shift apply to Oracle E-Business Suite Release 12.2.3 and later. Combinations with automated multi-node provisioning apply to Oracle E-Business Suite Release 12.2.6.

 Oracle Cloud Infrastructure Compute Classic only supports single-node (not Oracle RAC) databases.

For Oracle E-Business Suite Release 12.2.3 or later with Oracle Database Release 12.1.0.2 on DBCS or Exadata CS, note the following:

When running a database as a service in Oracle Cloud Infrastructure Classic, the database must be a multitenant container database (CDB). For Oracle E-Business Suite, you must convert to a CDB with a single pluggable database (PDB). The EBS Cloud Tools perform this conversion automatically. Cloning Oracle E-Business Suite from On-Premises to Oracle Cloud Infrastructure Classic for information on the cloning process.
A solution for "cloud-to-cloud" cloning is in progress.


Automated provisioning on a single node is available for Oracle E-Business Suite Release 12.2.7 (demo-only), 12.2.6, and 12.2.5 with a single-node Oracle Database 12.1.0.2 (not Oracle RAC).

Multi-node provisioning is available for Oracle E-Business Suite Release 12.2.6 with Oracle Database 12.1.0.2 on Database Cloud Service on a single node (not Oracle RAC).


Before we Begin

To get started, we must have an Oracle Compute Cloud Service (IaaS) account. There are two subscription options:

If you sign up for a metered subscription, the amount of computing resources (including CPU, memory and disk) available to your account is unlimited.
If you have a non-metered subscription, you have access to a fixed number of computing resources.

On EBS deployment for Oracle Cloud, there are three options available

1.Single node on Oracle Compute Cloud Service (IaaS)

This has the application and database installed in the single node.

2. Multiple nodes on Oracle Compute Cloud Service (IaaS)

The multiple nodes on IaaS option allows you to provision one or more application tiers, plus a separate database tier(on a separate compute instance), on the Oracle Compute Cloud Service. You can scale out the application tier as needed, and an automated provisioning tool enables you to create a new installation of Oracle E-Business Suite across Oracle Compute Cloud Service instances.


3.Compute Cloud Service (IaaS) + Oracle Database Cloud Service (DBCS)
In this variant, application is installed in the compute cloud service and database is installed as part of DBCS.


Now without further delay, lets jump to the steps

We should have a worksheet.


Generate an SSH key pair on your local system and upload the public key to the Oracle Compute Cloud Service: SSH key pair is required to SSH to the server that has been provisioned in Cloud. Generate public and private key using puttygen and save the keys locally and record the location. Upload the public key to Oracle Cloud during instance provisioning. 

Click on generate and move the mouse randomly in the blank area


In the key-comment, I have entered it as rsa-key-samrat and then entered the passphrase and confirm passphrase. Click on  save private key and save it under a folder and name it as same “key-comment”

Now we need to genrate our public keys
Next, save your SSH public key. select all of the characters in the Public key box as shown in above screenshot, right click somewhere in the selected text and select Copy from the menu.
Open a notepad and paste the characters. Ensure that you paste the text at the first character in the text editor, and don’t insert any line breaks. Save the key using the same root name that you used for the private key. Add a .pub extension.


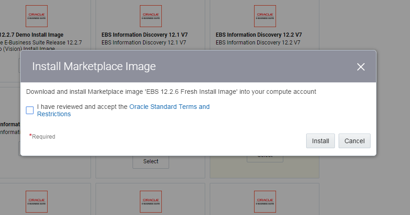
Next, once we have the subscription for Oracle compute classic, we can choose from the various EBS images available on Cloud


Choose from the various options available from above.


Now to create the instance, choose oc3 from below


click on >


add the public key which was created in the earlier steps


create the public IP reservation


Create the security list and click on >


review and create the instance


Now, we need to Configure the instance for SSH access.
Configure the Security Rules and open port 22 (for SSH) and port 8000 (for HTTP) to connect to your instance. Port 22 is to SSH to the EBS server and Port 8000 is to connect to EBS front end.


Change the default passwords for accounts.

[oracle@dc55f6 APPS]$ ls -lrt
total 36
drwxr-xr-x  3 oracle oinstall 4096 Jun  7  2016 data
drwxr-xr-x  4 oracle oinstall 4096 Aug 17  2016 fs_ne
drwxr-xr-x 77 oracle oinstall 4096 Feb 15 07:23 12.1.0
drwxr-xr-x  2 oracle oinstall 4096 Feb 15 07:25 scripts
drwxr-xr-x  5 oracle oinstall 4096 Feb 15 07:25 fs1
drwxr-xr-x  5 oracle oinstall 4096 Feb 15 07:59 fs2
-rw-r--r--  1 oracle oinstall 6469 Feb 15 08:19 EBSapps.env
drwxrwx---  7 oracle oinstall 4096 Feb 15 08:35 oraInventory
[oracle@dc55f6 APPS]$ pwd
/u01/install/APPS
[oracle@dc55f6 APPS]$

[oracle@dc55f6 APPS]$ . ./EBSapps.env RUN

  E-Business Suite Environment Information
  ----------------------------------------
  RUN File System           : /u01/install/APPS/fs1/EBSapps/appl
  PATCH File System         : /u01/install/APPS/fs2/EBSapps/appl
  Non-Editioned File System : /u01/install/APPS/fs_ne


  DB Host: ********************.oraclecloud.internal  Service/SID: EBSDB


  Sourcing the RUN File System ...

[oracle@dc55f6 APPS]$

[oracle@dc55f6 scripts]$ perl $FND_TOP/patch/115/bin/txkUpdateEBSDomain.pl -action=updateAdminPassword

Program: txkUpdateEBSDomain.pl started at Sat Feb 17 07:53:45 2018

AdminServer will be re started after changing WebLogic Admin Password
All Mid Tier services should be SHUTDOWN before changing WebLogic Admin Password
Confirm if all Mid Tier services are in SHUTDOWN state. Enter "Yes" to proceed or anything else to exit: Yes

Enter the full path of Applications Context File [DEFAULT - /u01/install/APPS/fs1/inst/apps/EBSDB_dc55f6/appl/admin/EBSDB_dc55f6.xml]:
Enter the WLS Admin Password:
Enter the new WLS Admin Password:
Enter the APPS user password:

Executing: /u01/install/APPS/fs1/FMW_Home/webtier/perl/bin/perl /u01/install/APPS/fs1/EBSapps/appl/ad/12.0.0/patch/115/bin/adProvisionEBS.pl  ebs-get-serverstatus -contextfile=/u01/install/APPS/fs1/inst/apps/EBSDB_dc55f6/appl/admin/EBSDB_dc55f6.xml -servername=AdminServer -promptmsg=hide -logfile=/u01/install/APPS/fs1/inst/apps/EBSDB_dc55f6/logs/appl/rgf/TXK/txkUpdateEBSDomain_Sat_Feb_17_07_53_45_2018/EBSProvisioner.log

Updating Weblogic Domain in online mode
---------------------------------------
Backup Location : /u01/install/APPS/fs1/inst/apps/EBSDB_dc55f6/logs/appl/rgf/TXK/txkUpdateEBSDomain_Sat_Feb_17_07_53_45_2018
Logfile Location: /u01/install/APPS/fs1/inst/apps/EBSDB_dc55f6/logs/appl/rgf/TXK/txkUpdateEBSDomain_Sat_Feb_17_07_53_45_2018/updateAdminPassword.log
Executing: /u01/install/APPS/fs1/EBSapps/comn/util/jdk32/jre/bin/java -classpath :/u01/install/APPS/fs1/FMW_Home/wlserver_10.3/server/lib/weblogic.jar:/u01/install/APPS/fs1/FMW_Home/Oracle_EBS-app1/oui/jlib/srvm.jar:/u01/install/APPS/fs1/EBSapps/comn/java/classes:/u01/install/APPS/fs1/EBSapps/comn/shared-libs/ebs-3rdparty/WEB-INF/lib/ebs3rdpartyManifest.jar:/u01/install/APPS/fs1/FMW_Home/Oracle_EBS-app1/shared-libs/ebs-appsborg/WEB-INF/lib/ebsAppsborgManifest.jar oracle.apps.ad.util.UpdateEBSDomain updateAdminPassword  -contextfile /u01/install/APPS/fs1/inst/apps/EBSDB_dc55f6/appl/admin/EBSDB_dc55f6.xml -promptmsg hide -logdir /u01/install/APPS/fs1/inst/apps/EBSDB_dc55f6/logs/appl/rgf/TXK/txkUpdateEBSDomain_Sat_Feb_17_07_53_45_2018 -logfile /u01/install/APPS/fs1/inst/apps/EBSDB_dc55f6/logs/appl/rgf/TXK/txkUpdateEBSDomain_Sat_Feb_17_07_53_45_2018/updateAdminPassword.log


*************** IMPORTANT ****************
WebLogic Admin Password is changed.
Restart all application tier services using control scripts.
********************************************


Program: txkUpdateEBSDomain.pl completed at Sat Feb 17 07:57:37 2018


Change Oracle E-Business Suite Passwords


enable sysadmin password
[oracle@dc55f6 scripts]$ enableSYSADMIN.sh

This script will let you set a new password for the SYSADMIN EBS Applications User,
the default password most likely was "sysadmin", so pick a different one now.

Enter new password for SYSADMIN:
 Re-enter password for SYSADMIN:
Changing password for SYSADMIN
Log filename : L520645.log


Report filename : O520645.out


Configure the web entry point.
Oracle E-Business Suite instance on Oracle Cloud is installed with an internal DNS name and a private IP address, and so is not accessible from the public Internet. To make the instance accessible from the public Internet, you need to set the web entry point parameters in the applications context file to point to the <publichostname>.<publicdomain> name.


Configure your instance for HTTP access


Run the following script to configure the web entry point:
$ /u01/install/scripts/configwebentry.sh

[oracle@dc55f6 scripts]$ sh configwebentry.sh

Press any key to continue...

Enter the values for the following parameters to configure the Web Entry Point

Enter the Web Entry Protocol (Eg: https/http):http

Enter the Web Entry Host Name(Eg: public):oc-************

Enter the Web Entry Domain Name:(Eg: domain.com):compute.oraclecloud.com

Enter the Web Entry Port:(Eg: 443/80):8000

Enter the E-Business Suite Base install directory:(Eg: /u02/opc122):/u01/install/APPS


The Web Entry Point Parameters in the context file will be updated with
webentryprotcol=http
webentryhostname=**********
webentrydomain=compute.oraclecloud.com
webentryport=8000

Press any key to continue...

  E-Business Suite Environment Information
  ----------------------------------------
  RUN File System           : /u01/install/APPS/fs1/EBSapps/appl
  PATCH File System         : /u01/install/APPS/fs2/EBSapps/appl
  Non-Editioned File System : /u01/install/APPS/fs_ne


  DB Host: ********.compute-593624448.oraclecloud.internal  Service/SID: EBSDB


  Sourcing the RUN File System ...


Updating variable s_webentryurlprotocol in context file /u01/install/APPS/fs1/inst/apps/EBSDB_dc55f6/appl/admin/EBSDB_dc55f6.xml with value:  http

Updating variable s_webentryhost in context file /u01/install/APPS/fs1/inst/apps/EBSDB_dc55f6/appl/admin/EBSDB_dc55f6.xml with value:  oc-129-154-77-212

Updating variable s_webentrydomain in context file /u01/install/APPS/fs1/inst/apps/EBSDB_dc55f6/appl/admin/EBSDB_dc55f6.xml with value:  compute.oraclecloud.com

Updating variable s_active_webport in context file /u01/install/APPS/fs1/inst/apps/EBSDB_dc55f6/appl/admin/EBSDB_dc55f6.xml with value:  8000

Updating variable s_login_page in context file /u01/install/APPS/fs1/inst/apps/EBSDB_dc55f6/appl/admin/EBSDB_dc55f6.xml with value:  http://oc-129-154-77-212.compute.oraclecloud.com:8000/OA_HTML/AppsLogin

Updating variable s_external_url in context file /u01/install/APPS/fs1/inst/apps/EBSDB_dc55f6/appl/admin/EBSDB_dc55f6.xml with value:  http://oc-129-154-77-212.compute.oraclecloud.com:8000/OA_HTML/AppsLogin

Updating variable s_chronosURL in context file /u01/install/APPS/fs1/inst/apps/EBSDB_dc55f6/appl/admin/EBSDB_dc55f6.xml with value:  http://oc-129-154-77-212.compute.oraclecloud.com:8000/oracle_smp_chronos/oracle_smp_chronos_sdk.gif

Updating variable s_endUserMonitoringURL in context file /u01/install/APPS/fs1/inst/apps/EBSDB_dc55f6/appl/admin/EBSDB_dc55f6.xml with value:  http://oc-129-154-77-212.compute.oraclecloud.com:8000/oracle_smp_chronos/oracle_smp_chronos_sdk.gif


Updating Context file /u01/install/APPS/fs1/inst/apps/EBSDB_dc55f6/appl/admin/EBSDB_dc55f6.xml
Updating variable s_webentryurlprotocol in context file /u01/install/APPS/fs2/inst/apps/EBSDB_dc55f6/appl/admin/EBSDB_dc55f6.xml with value:  http

Updating variable s_webentryhost in context file /u01/install/APPS/fs2/inst/apps/EBSDB_dc55f6/appl/admin/EBSDB_dc55f6.xml with value:  oc-129-154-77-212

Updating variable s_webentrydomain in context file /u01/install/APPS/fs2/inst/apps/EBSDB_dc55f6/appl/admin/EBSDB_dc55f6.xml with value:  compute.oraclecloud.com

Updating variable s_active_webport in context file /u01/install/APPS/fs2/inst/apps/EBSDB_dc55f6/appl/admin/EBSDB_dc55f6.xml with value:  8000

Updating variable s_login_page in context file /u01/install/APPS/fs2/inst/apps/EBSDB_dc55f6/appl/admin/EBSDB_dc55f6.xml with value:  http://oc-129-154-77-212.compute.oraclecloud.com:8000/OA_HTML/AppsLogin

Updating variable s_external_url in context file /u01/install/APPS/fs2/inst/apps/EBSDB_dc55f6/appl/admin/EBSDB_dc55f6.xml with value:  http://oc-129-154-77-212.compute.oraclecloud.com:8000/OA_HTML/AppsLogin

Updating variable s_chronosURL in context file /u01/install/APPS/fs2/inst/apps/EBSDB_dc55f6/appl/admin/EBSDB_dc55f6.xml with value:  http://oc-129-154-77-212.compute.oraclecloud.com:8000/oracle_smp_chronos/oracle_smp_chronos_sdk.gif

Updating variable s_endUserMonitoringURL in context file /u01/install/APPS/fs2/inst/apps/EBSDB_dc55f6/appl/admin/EBSDB_dc55f6.xml with value:  http://oc-129-154-77-212.compute.oraclecloud.com:8000/oracle_smp_chronos/oracle_smp_chronos_sdk.gif

Running AutoConfig to complete the configuration
Enter the APPS user password:

The log file for this session is located at: /u01/install/APPS/fs1/inst/apps/EBSDB_dc55f6/admin/log/02170904/adconfig.log

AutoConfig is configuring the Applications environment...

AutoConfig will consider the custom templates if present.
        Using CONFIG_HOME location     : /u01/install/APPS/fs1/inst/apps/EBSDB_dc55f6
        Classpath                   : /u01/install/APPS/fs1/FMW_Home/Oracle_EBS-app1/shared-libs/ebs-appsborg/WEB-INF/lib/ebsAppsborgManifest.jar:/u01/install/APPS/fs1/EBSapps/comn/java/classes

        Using Context file          : /u01/install/APPS/fs1/inst/apps/EBSDB_dc55f6/appl/admin/EBSDB_dc55f6.xml

Context Value Management will now update the Context file

        Updating Context file...COMPLETED

        Attempting upload of Context file and templates to database...COMPLETED

Configuring templates from all of the product tops...
        Configuring AD_TOP........COMPLETED
        Configuring FND_TOP.......COMPLETED
        Configuring ICX_TOP.......COMPLETED
        Configuring MSC_TOP.......COMPLETED
        Configuring IEO_TOP.......COMPLETED
        Configuring BIS_TOP.......COMPLETED
        Configuring CZ_TOP........COMPLETED
        Configuring SHT_TOP.......COMPLETED
        Configuring AMS_TOP.......COMPLETED
        Configuring CCT_TOP.......COMPLETED
        Configuring WSH_TOP.......COMPLETED
        Configuring CLN_TOP.......COMPLETED
        Configuring OKE_TOP.......COMPLETED
        Configuring OKL_TOP.......COMPLETED
        Configuring OKS_TOP.......COMPLETED
        Configuring CSF_TOP.......COMPLETED
        Configuring IBY_TOP.......COMPLETED
        Configuring JTF_TOP.......COMPLETED
        Configuring MWA_TOP.......COMPLETED
        Configuring CN_TOP........COMPLETED
        Configuring CSI_TOP.......COMPLETED
        Configuring WIP_TOP.......COMPLETED
        Configuring CSE_TOP.......COMPLETED
        Configuring EAM_TOP.......COMPLETED
        Configuring GMF_TOP.......COMPLETED
        Configuring PON_TOP.......COMPLETED
        Configuring FTE_TOP.......COMPLETED
        Configuring ONT_TOP.......COMPLETED
        Configuring AR_TOP........COMPLETED
        Configuring AHL_TOP.......COMPLETED
        Configuring IES_TOP.......COMPLETED
        Configuring OZF_TOP.......COMPLETED
        Configuring CSD_TOP.......COMPLETED
        Configuring IGC_TOP.......COMPLETED

AutoConfig completed successfully.

[oracle@dc55f6 scripts]$
restart the instance
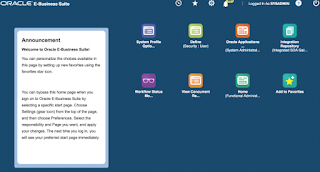
so now the url will construct to http:// *************.compute.oraclecloud.com:8000/OA_HTML/AppsLogin


References:
http://www.oracle.com/us/products/applications/ebs-on-oracle-cloud-3220296.pdf
https://blogs.oracle.com/ebsandoraclecloud/new-white-paper%3a-oracle-e-business-suite-on-oracle-cloud
https://apexapps.oracle.com/pls/apex/f?p=44785:141:::::P141_PAGE_ID,P141_SECTION_ID:379,2907

Getting Started with Oracle E-Business Suite on Oracle Cloud Infrastructure (Doc ID 2517025.1)
E-Business Suite 12.2 Platform Migration from On-Premises to Oracle Cloud using Transportable Tablespaces with 12cR1 (Doc ID 2473449.1)
Application Tier Platform Migration with Oracle E-Business Suite Release 12.2 (Doc ID 2048954.1)
Deploying Oracle E-Business Suite Cloud Manager on Oracle Cloud Infrastructure, and My Oracle Support Knowledge Document 2522175.1, Preparing Your Oracle Cloud Infrastructure Tenancy for a New Set of Oracle E-Business Suite Environments.
https://www.oracle.com/webfolder/technetwork/tutorials/obe/cloud/compute-iaas/advanced_provisioning_in_ebs_cloud_manager_on_oci/104advprov.html#BeforeYouBegin


Tuesday, February 6, 2018

Oracle Database 12c Release 1 (12.1) RAC GRID Infrastructure installation

This is a step by step installation of Oracle 12cR1 RAC grid infrastructure on Virtual box.

Below are the high level steps

The network settings has to be adjusted accordingly


                                                                                                                                                                      Ram selected for both the nodes- 4 gb each

I have not covered the OS installation and creating the mounts as this is available in numerous blogs. You can create the virtual machine nodes accordingly.


Configuring the Oracle ASM library driver.

This will configure the on-boot properties of the Oracle ASM library
driver.  The following questions will determine whether the driver is
loaded on boot and what permissions it will have.  The current values
will be shown in brackets ('[]').  Hitting <ENTER> without typing an
answer will keep that current value.  Ctrl-C will abort.
Default user to own the driver interface [oracle]: oracle
Default group to own the driver interface [dba]: oinstall
Start Oracle ASM library driver on boot (y/n) [y]: y
Scan for Oracle ASM disks on boot (y/n) [y]:
Writing Oracle ASM library driver configuration: done
[root@ebs1 ~]#
[root@ebs1 ~]# mkdir -p /u01/app/12.1.0/grid_1
[root@ebs1 ~]# mkdir -p /u01/app/oracle
[root@ebs1 ~]# chown -R oracle:oinstall /u01
[root@ebs1 ~]# chown oracle:oinstall /u01/app/oracle
[root@ebs1 ~]# chmod -R 775 /u01/
[root@ebs1 ~]#


Disable secure linux by editing the "/etc/selinux/config" file, making sure the SELINUX flag is set as follows.

SELINUX=disabled


Either configure NTP, or make sure it is not configured so the Oracle Cluster Time Synchronization Service (ctssd) can synchronize the times of the RAC nodes. In this case we will deconfigure NTP.
# service ntpd stop
Shutting down ntpd:                                        [FAILED]
# chkconfig ntpd off


add the below in /etc/hosts file
# Do not remove the following line, or various programs
# that require network functionality will fail.
127.0.0.1               localhost.localdomain localhost
::1             localhost6.localdomain6 localhost6
#192.168.56.2   ebs1.oracle.com          ebs1
#192.168.56.4   rac2.localdomain          rac2
#192.168.56.3   ebs2.oracle.com           ebs2
#public
192.168.56.2   rac1.localdomain          rac1
192.168.56.3   rac2.localdomain          rac2
#private
192.168.100.101 rac1-priv.localdomain     rac1-priv
192.168.100.102  rac2-priv.localdomain     rac2-priv
#virtual
192.168.56.108  rac1-vip.localdomain    rac1-vip
192.168.56.109  rac2-vip.localdomain    rac2-vip
#Scan
192.168.56.105  rac-scan.localdomain    rac-scan
192.168.56.106  rac-scan.localdomain    rac-scan
192.168.56.107  rac-scan.localdomain    rac-scan

***************
Note-SCAN(started from 11g R2) provides a single domain name via DNS), allowing and-users to address a RAC cluster as-if it were a single IP address. SCAN works by replacing a hostname or IP list with virtual IP addresses (VIP).
Because SCAN determines the actual node and listener which accepts the connection, SCAN provides location independence for the databases.  A SCAN database connection does not require any details about a particular node on instance.  SCAN is part of the 11g release 2 movement toward "RAC Virtualization"

QA session:-

Does scan actually performs connection load balancing?

Yes, it does. The LREG process of each instance registers the database service with the local listener as well as all the SCAN listeners (typically they are specified by the parameter: REMOTE_LISTENER). When a connection request gets routed to a particular SCAN listener, then the SCAN listener does a quick calculation to find out the least loaded node, and once it gets that information, it sends the address of the local listener on that node back to the client to establish the connection. That is how load balancing is done by the SCAN listeners.

For clients connecting using SCAN, three IP addresses will be received by the client by resolving the SCAN name through DNS as discussed. The client will then go through the list it receives from the DNS and try connecting through one of the IPs received. If the client receives an error, it will try the other addresses before returning an error to the user or application. This is similar to how client connection failover works in previous releases when an address list is provided in the client connection string.
When a SCAN Listener receives a connection request, the SCAN Listener will check for the least loaded instance providing the requested service. It will then re-direct the connection request to the local listener on the node where the least loaded instance is running. Subsequently, the client will
be given the address of the local listener. The local listener will finally create the connection to the database instance


Difference between local listener and remote listener?

LOCAL_LISTENER on each node should point to the listener on that node. REMOTE_LISTENER should point to all listeners on all nodes if you want server side load balancing, otherwise don’t set REMOTE_LISTENER.
the purpose of REMOTE_LISTENER is to connect all instances with all listeners so the instances can propagate their load balance advisories to all listeners. if you connect to a listener, this listener uses the advisories to decide who should service your connect. if the listener decides its local instance(s) are least loaded and should service your connect it passes your connect to the local instance. if the node you connected to is overloaded,
the listener can use TNS redirect to redirect your connect a less loaded instance.

****************
As i am using 3 interfaces, i need to activate them.

First Node
1st ethernet is set to automatic and DHCP.
second ethernet is set to static 192.168.56.2 subnet mas-255.255.255.0  gateway-192.168.56.1
third ethernet is set to static 192.168.100.101 and subnet mask 255.255.255.0 and gateway blank

Second node(has to be done after clone)
eth0 - DHCP
eth1- 192.168.56.3, 255.255.255.0 192.168.56.1
eth2  - 192.168.100.102, 255.255.255.0 and gateway as blank


enable  PermitRootLogin to yes in  /etc/ssh/sshd_config.
[root@rac1 ~]# service sshd restart
Stopping sshd:                                             [  OK  ]
Starting sshd:                                             [  OK  ]
[root@rac1 ~]#


[root@rac1 ~]# groupadd -g 54321 oinstall
groupadd: group oinstall exists--In my case it was already present
[root@rac1 ~]# groupadd -g 54322 dba
groupadd: group dba exists--In my case it was already present
[root@rac1 ~]# groupadd -g 54323 oper
[root@rac1 ~]# groupadd -g 54325 asmdba
[root@rac1 ~]# groupadd -g 54328 asmadmin
[root@rac1 ~]# groupadd -g 54329 asmoper

[root@rac1 ~]# /usr/sbin/useradd -u 54322 -g oinstall -G asmadmin,asmdba,asmoper,dba grid
[root@rac1 ~]# useradd -u 54321 -g oinstall -G dba,asmdba,oper,asmadmin oracle
useradd: user oracle exists--In my case it was already present
[root@rac1 ~]#


Please modify below files to make compatible for RAC installation

/etc/selinux/config
SELINUX= permissive
/etc/systemd/logind.conf
RemoveIPC=no
/etc/sysconfig/network
NOZEROCONF=yes


Disable firewall services

systemctl stop firewalld.service
systemctl disable firewalld.service

Please add following entry in /etc/pam.d/login

session required /lib64/security/pam_limits.so
session required pam_limits.so

Please create following directory and change the permissions

[root@rac1 ~]# mkdir -p /u01/app/grid
[root@rac1 ~]# mkdir -p /u01/app/product
[root@rac1 ~]# mkdir -p /u01/app/oraInventory
[root@rac1 ~]# mkdir -p /u01/app/oracle
[root@rac1 ~]# chown -R oracle:oinstall /u01
[root@rac1 ~]# chown -R grid:oinstall /u01/app/oraInventory
[root@rac1 ~]# chown -R grid:oinstall /u01/app/grid
[root@rac1 ~]# chmod -R 775 /u01/
[root@rac1 ~]# chmod -R 770 /u01/app/oraInventory
[root@rac1 ~]# chown -R oracle:oinstall /u01
[root@rac1 ~]# chown -R grid:oinstall /u01/app/oraInventory
[root@rac1 ~]# chown -R grid:oinstall /u01/app/grid
[root@rac1 ~]# chmod -R 775 /u01/
[root@rac1 ~]# chmod -R 770 /u01/app/oraInventory

Please add/modify .bash_profile under oracle user in /home/oracle
# .bash_profile

# Get the aliases and functions
if [ -f ~/.bashrc ]; then
        . ~/.bashrc
fi

# User specific environment and startup programs

PATH=$PATH:$HOME/bin

export PATH
export ORACLE_BASE=/u01/app/oracle
ORACLE_HOME=$ORACLE_BASE/product/12c/db_1
LD_LIBRARY_PATH=$ORACLE_HOME/lib:/lib:/usr/lib
LD_LIBRARY_PATH_64=$ORACLE_HOME/lib
export ORACLE_BASE ORACLE_HOME LD_LIBRARY_PATH LD_LIBRARY_PATH_64

TNS_ADMIN=$ORACLE_HOME/network/admin
LIB_PATH=$ORACLE_HOME/lib
SQLPATH=$ORACLE_HOME/lib
CLASSPATH=$ORACLE_HOME/jlib:$ORACLE_HOME/rdbms/jlib
export ORACLE_PROCDIR ORACLE_PATH ORACLE_PROC ORA_NLS10 NLS_LANG TNS_ADMIN LIB_PATH SQLPATH CLASSPATH

PATH=$PATH:$ORACLE_HOME/bin:/usr/ccs/bin:/usr/bin:/etc:/usr/openwin/bin:/usr/sbin:/usr/ucb/bin:/usr/local/bin/:/usr/sfw/bin
export PATH

have not added ORACLE_SID as of now.

Please add/modify .bash_profile under grid user in /home/grid

# .bash_profile

# Get the aliases and functions
if [ -f ~/.bashrc ]; then
        . ~/.bashrc
fi

# User specific environment and startup programs

PATH=$PATH:$HOME/bin

export PATH

export ORACLE_BASE=/u01/app/grid
ORACLE_HOME=$ORACLE_BASE/product/grid
LD_LIBRARY_PATH=$ORACLE_HOME/lib:/lib:/usr/lib
LD_LIBRARY_PATH_64=$ORACLE_HOME/lib
export ORACLE_BASE ORACLE_HOME LD_LIBRARY_PATH LD_LIBRARY_PATH_64


TNS_ADMIN=$ORACLE_HOME/network/admin
LIB_PATH=$ORACLE_HOME/lib
SQLPATH=$ORACLE_HOME/lib
CLASSPATH=$ORACLE_HOME/jlib:$ORACLE_HOME/rdbms/jlib
export ORACLE_PROCDIR ORACLE_PATH ORACLE_PROC ORA_NLS10 NLS_LANG TNS_ADMIN LIB_PATH SQLPATH CLASSPATH


PATH=$PATH:$ORACLE_HOME/bin:/usr/ccs/bin:/usr/bin:/etc:/usr/openwin/bin:/usr/sbin:/usr/ucb/bin:/usr/local/bin/:/usr/sfw/bin
export PATH


I will use a single raw disks(/dev/sdd1) for creating a ASM diskgroup of 60 Gb size.

Please add following entry to enable SCSI

Add the following to the “/etc/scsi_id.config” file to configure SCSI devices as trusted. Create the file if it doesn’t already exist.
options=-g


Please identify SCSI ID using following command for each individual disk of ASM which is added and shared.
[root@rac1]# /usr/lib/udev/scsi_id -g -u -d /dev/sdd

1ATA_VBOX_HARDDISK_VB7a401c0f-c528452b

Now you need to use partprobe to refresh new partitions

[root@rac1 /]# /sbin/partprobe /dev/sdd1


clone the rac1 machine and make it rac2 in hostname. And intiaialize all the ethernet ips one by one


eth0 DHCP
eth1- 192.168.56.3, 255.255.255.0 192.168.56.1
eth2  - 192.168.100.102, 255.255.255.0 and gateway as blank

ping rac1 and rac2 from each of them

[root@rac1 ~]# oracleasm createdisk DISK1 /dev/sdd1
Writing disk header: done
Instantiating disk: done
[root@rac1 ~]# oracleasm scandisks
Reloading disk partitions: done
Cleaning any stale ASM disks...
Scanning system for ASM disks...
[root@rac1 ~]# oracleasm listdisks
DISK1
login as: root
root@192.168.56.3's password:
Last login: Thu Jan 11 11:08:25 2018
[root@rac2 ~]#  oracleasm listdisks
[root@rac2 ~]# oracleasm scandisks
Reloading disk partitions: done
Cleaning any stale ASM disks...
Scanning system for ASM disks...
Instantiating disk "DISK1"
[root@rac2 ~]#  oracleasm listdisks
DISK1
[root@rac2 ~]#


==========================
Invoke the run installer now

Oracle Universal Installer has to run from Grid User 


Click on add


Click on SSh connectivity and click on setup.


[grid@rac2 u01]$ crsctl stat res -t
--------------------------------------------------------------------------------
Name           Target  State        Server                   State details
--------------------------------------------------------------------------------
Local Resources
--------------------------------------------------------------------------------
ora.DATA.dg
               ONLINE  ONLINE       rac1                     STABLE
               ONLINE  ONLINE       rac2                     STABLE
ora.LISTENER.lsnr
               ONLINE  ONLINE       rac1                     STABLE
               ONLINE  ONLINE       rac2                     STABLE
ora.asm
               ONLINE  ONLINE       rac1                     Started,STABLE
               ONLINE  ONLINE       rac2                     Started,STABLE
ora.net1.network
               ONLINE  ONLINE       rac1                     STABLE
               ONLINE  ONLINE       rac2                     STABLE
ora.ons
               ONLINE  ONLINE       rac1                     STABLE
               ONLINE  ONLINE       rac2                     STABLE
--------------------------------------------------------------------------------
Cluster Resources
--------------------------------------------------------------------------------
ora.LISTENER_SCAN1.lsnr
      1        ONLINE  ONLINE       rac1                     STABLE
ora.MGMTLSNR
      1        ONLINE  ONLINE       rac1                     169.254.123.173 192.
                                                             168.100.101,STABLE
ora.cvu
      1        ONLINE  ONLINE       rac1                     STABLE
ora.mgmtdb
      1        ONLINE  ONLINE       rac1                     Open,STABLE
ora.oc4j
      1        ONLINE  ONLINE       rac1                     STABLE
ora.rac1.vip
      1        ONLINE  ONLINE       rac1                     STABLE
ora.rac2.vip
      1        ONLINE  ONLINE       rac2                     STABLE
ora.scan1.vip
      1        ONLINE  ONLINE       rac1                     STABLE
--------------------------------------------------------------------------------
[grid@rac2 u01]$
Check the status of running clusterware. On rac1 as root user:
[root@rac1 grid]# crsctl stat res -t
--------------------------------------------------------------------------------
Name           Target  State        Server                   State details
--------------------------------------------------------------------------------
Local Resources
--------------------------------------------------------------------------------
ora.DATA.dg
               ONLINE  ONLINE       rac1                     STABLE
               ONLINE  ONLINE       rac2                     STABLE
ora.LISTENER.lsnr
               ONLINE  ONLINE       rac1                     STABLE
               ONLINE  ONLINE       rac2                     STABLE
ora.asm
               ONLINE  ONLINE       rac1                     Started,STABLE
               ONLINE  ONLINE       rac2                     Started,STABLE
ora.net1.network
               ONLINE  ONLINE       rac1                     STABLE
               ONLINE  ONLINE       rac2                     STABLE
ora.ons
               ONLINE  ONLINE       rac1                     STABLE
               ONLINE  ONLINE       rac2                     STABLE
--------------------------------------------------------------------------------
Cluster Resources
--------------------------------------------------------------------------------
ora.LISTENER_SCAN1.lsnr
      1        ONLINE  ONLINE       rac1                     STABLE
ora.MGMTLSNR
      1        ONLINE  ONLINE       rac1                     169.254.123.173 192.
                                                             168.100.101,STABLE
ora.cvu
      1        ONLINE  ONLINE       rac1                     STABLE
ora.mgmtdb
      1        ONLINE  ONLINE       rac1                     Open,STABLE
ora.oc4j
      1        ONLINE  ONLINE       rac1                     STABLE
ora.rac1.vip
      1        ONLINE  ONLINE       rac1                     STABLE
ora.rac2.vip
      1        ONLINE  ONLINE       rac2                     STABLE
ora.scan1.vip
      1        ONLINE  ONLINE       rac1                     STABLE
--------------------------------------------------------------------------------
[root@rac1 grid]#


Now I will proceed for Oracle 12 database binary installation:-This will be done using Oracle user.
Login as Oracle user and invoke the installer


lets check the status of the database
[oracle@rac1 bin]$ ps -ef|grep pmon
oracle   17755 14437  0 23:06 pts/2    00:00:00 grep pmon
grid     22615     1  0 18:55 ?        00:00:01 asm_pmon_+ASM1
grid     24307     1  0 18:57 ?        00:00:00 mdb_pmon_-MGMTDB
oracle   31684     1  0 22:09 ?        00:00:00 ora_pmon_PROD1

export ORACLE_SID=PROD1

[oracle@rac1 dbs]$ sqlplus / as sysdba

SQL*Plus: Release 12.1.0.2.0 Production on Fri Feb 2 00:39:08 2018

Copyright (c) 1982, 2014, Oracle.  All rights reserved.


Connected to:
Oracle Database 12c Enterprise Edition Release 12.1.0.2.0 - 64bit Production
With the Partitioning, Real Application Clusters, Automatic Storage Management, OLAP,
Advanced Analytics and Real Application Testing options

SQL> SELECT inst_name FROM v$active_instances;

INST_NAME
------------------------------------------------------------
rac1.localdomain:PROD1
rac2.localdomain:PROD2


[oracle@rac1 dbs]$ srvctl status database -d PROD
Instance PROD1 is running on node rac1
Instance PROD2 is running on node rac2